Guide to annotating in 3D
Opening the 3D interface
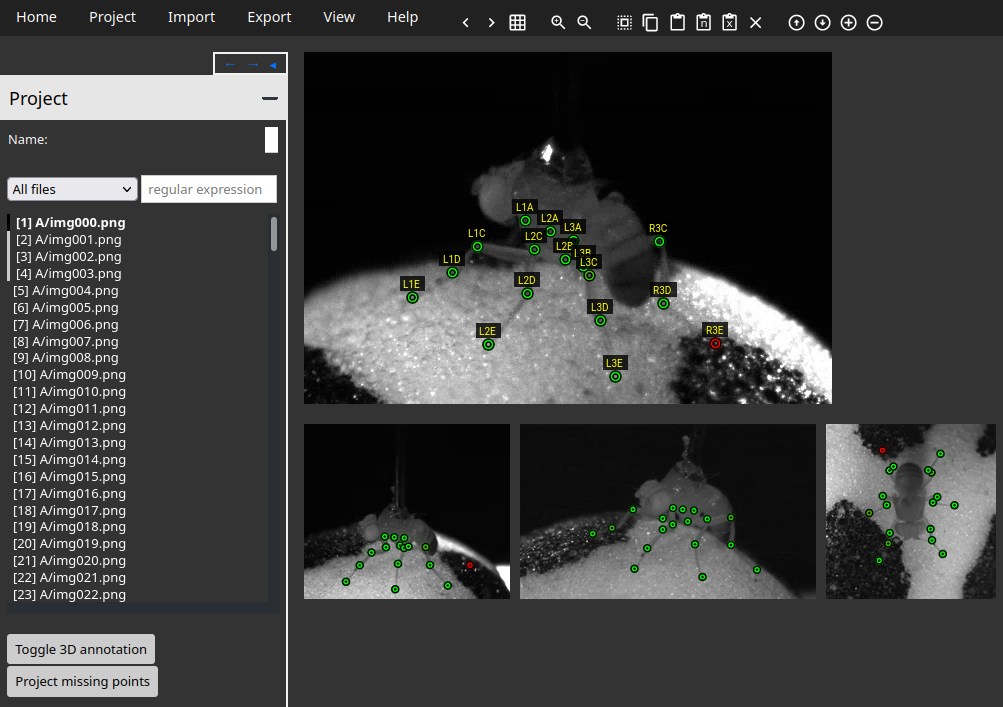
Okay, we’re set up to label. Let’s try labeling in 3D! Click “Toggle 3D annotation” button to enable 3D annotation.
You should see the following image: 
You should see multiple views at the bottom. You can click on another view to jump to that camera.
Note also the colors of the points! In 3D annotation mode, green means low reprojection error across views (< 2 pixels) and red means high error (> 15 pixels). You may see orange-ish points that have somewhere between 2 and 15 pixels. It’s the mean error across all views, per point. You’ll have to discern which view(s) are causing the issue.
Annotating
How to annotate?
Place keypoints by clicking in the image. The keypoints will be placed following the order of bodyparts. You can move a keypoint by clicking it and dragging it. Whenever a keypoint is placed or moved, the error is recomputed and all points are recolored.
To mark a keypoint as not missing (not visible), place it in within 50 pixels of the top left corner.
Useful shortcuts:
- select a keypoint and press “d” (or X icon in toolbar) to delete it
- select all keypoints by pressing “a”
- select a keypoint and press “m” to mark as missing (moving to top left corner)
Projecting points
Now let me introduce you to a feature that feels magical to me.
If you have a point labeled in 2 or more views, you can triangulate and project that point onto a new view!
To do so, make sure that the point is deleted from the current view (select and press “d” or click the “x” at the top if needed). Then, click the “Project missing points” button. Any point visible in 2+ other views will be projected onto current view!
I find this useful for placing keypoints initially, especially in views where the pose is hard to annotate. The accuracy of the projection will depend on the accuracy of the labels in other views and the camera calibrations.