Tutorial: Annotate Anipose format in 3D
An example dataset
You can find an example fly dataset from google drive. We will use the fly dataset in this tutorial. This dataset is an annotation folder used for tracking flies in Karashchuk et al, “Anipose: A toolkit for robust markerless 3D pose estimation”, Cell Reports, 2021.
If you want another dataset for comparison, you can also find an example mouse annotation dataset here.
Anipose annotation format
The Anipose annotation format is an extension of the DeepLabCut and Lighting Pose formats to support multiview annotation.
If you upgrade anipose to latest version (at least 1.1.2), running anipose extract-frames will now generate this format.
The structure of the annotation format:
- in main folder (“sarah6_4.8.21_2021-04-28_09-14” in example)
- CollectedData.csv - file with annotations
- calibration.toml - calibration file generated by anipose
- config.toml - should have camera cropping offsets (if any)
- a subfolder for each camera (e.g. “A” in example) containing
- images to annotate - should have same names across camera folders
- anipose_metadata.csv - not used by Anivia, metadata to keep track of frame sources
Importing annotations
Open Anivia, then follow the steps below to import this Anipose dataset:
- In menu: Import > “Load Anipose Dataset”
- Select the main folder which contains all the camera subfolders: sarah6_4.8.21_2021-04-28_09-14
- Click “upload”
- Confirm you want to “upload” the files
For Anipose datasets, the annotation is completely local: no files are sent out of your machine.

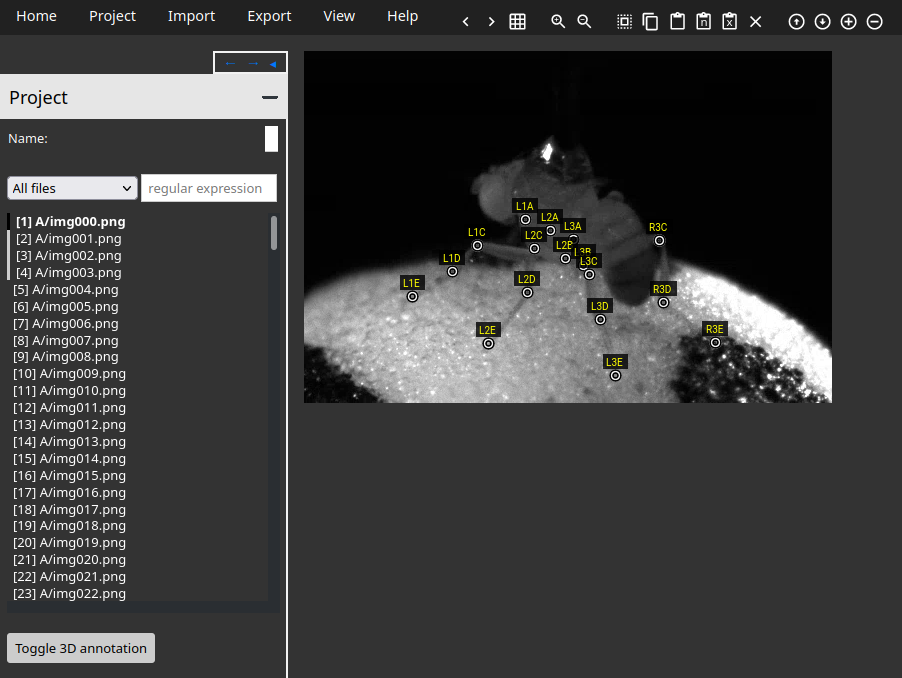
In the image above, you can see the different labeled points (L1A, L1B, L1C, etc) in the image.
To navigate across images, you can use the left/right arrow keys, clicking in the file menu, or click the left/right arrows in the toolbar.
Specifying bodyparts
Let’s look at the bodyparts for this dataset!
In the menu, click on: Project > Edit bodyparts
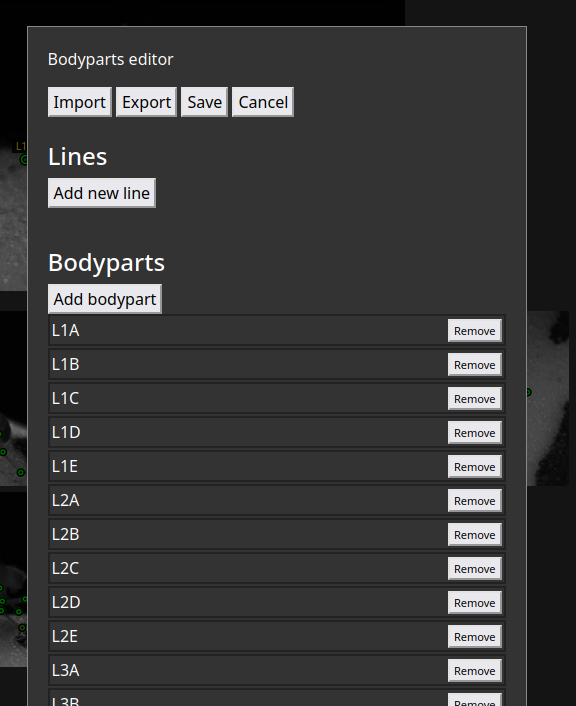
You will enter the Bodyparts editor, where you can add or remove bodyparts. It should look like the image below.

If you have some annotations within your files already, the bodyparts will automatically be populated as in this example. If there are no labels yet, you will need to specify bodyparts.
You can drag bodyparts around to change the order for labeling.
Optionally, you may export the bodyparts to a “bodyparts.toml” file by clicking Export. You can then import this file again to speed up adding bodyparts to a new dataset.
Labeling in 3D
Opening the 3D interface
Okay, we’re set up to label. Let’s try labeling in 3D! Click “Toggle 3D annotation” button to enable 3D annotation.
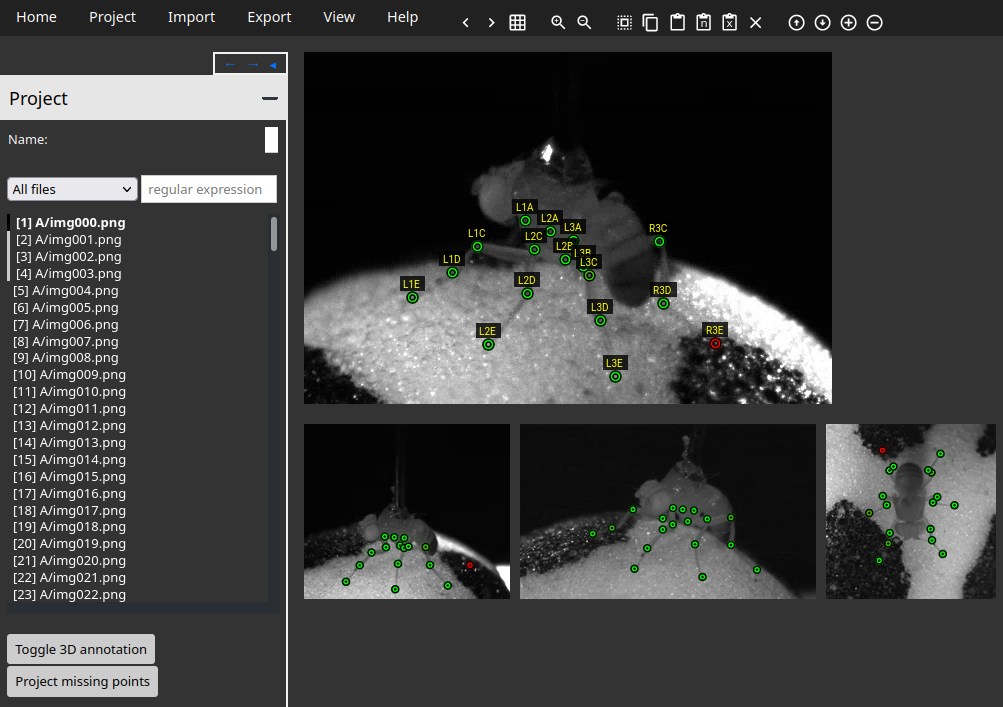
You should see the following image: 
You should see multiple views at the bottom. You can click on another view to jump to that camera.
Note also the colors of the points! In 3D annotation mode, green means low reprojection error across views (< 2 pixels) and red means high error (> 15 pixels). You may see orange-ish points that have somewhere between 2 and 15 pixels. It’s the mean error across all views, per point. You’ll have to discern which view(s) are causing the issue.
Annotating
How to annotate?
Place keypoints by clicking in the image. The keypoints will be placed following the order of bodyparts. You can move a keypoint by clicking it and dragging it. Whenever a keypoint is placed or moved, the error is recomputed and all points are recolored.
To mark a keypoint as not missing (not visible), place it in within 50 pixels of the top left corner.
Useful shortcuts:
- select a keypoint and press “d” (or X icon in toolbar) to delete it
- select all keypoints by pressing “a”
- select a keypoint and press “m” to mark as missing (moving to top left corner)
Projecting points
Now let me introduce you to a feature that feels magical to me.
If you have a point labeled in 2 or more views, you can triangulate and project that point onto a new view!
To do so, make sure that the point is deleted from the current view (select and press “d” or click the “x” at the top if needed). Then, click the “Project missing points” button. Any point visible in 2+ other views will be projected onto current view!
I find this useful for placing keypoints initially, especially in views where the pose is hard to annotate. The accuracy of the projection will depend on the accuracy of the labels in other views and the camera calibrations.
Exporting
When done, in menu click on: Export > Export Annotations (Anipose format)
Save the file as “CollectedData.csv” in the main Anipose folder (“sarah6_4.8.21_2021-04-28_09-14” in example).
You may need to change settings in your browser to make it prompt where to save your downloaded file.